

Jaw Crusher Installation Guide: Foundation, Alignment, and Commissioning
What You Will Learn from This Guide
A jaw crusher installation succeeds or fails at the foundation, not at startup. This guide covers foundation design, anchor bolt grouting, drive alignment, guarding compliance, and the first-run checks that follow commissioning. It is written for a site engineer or contractor planning an installation, and after reading, you will have a step-by-step sequence to follow instead of a generic checklist.
Overview
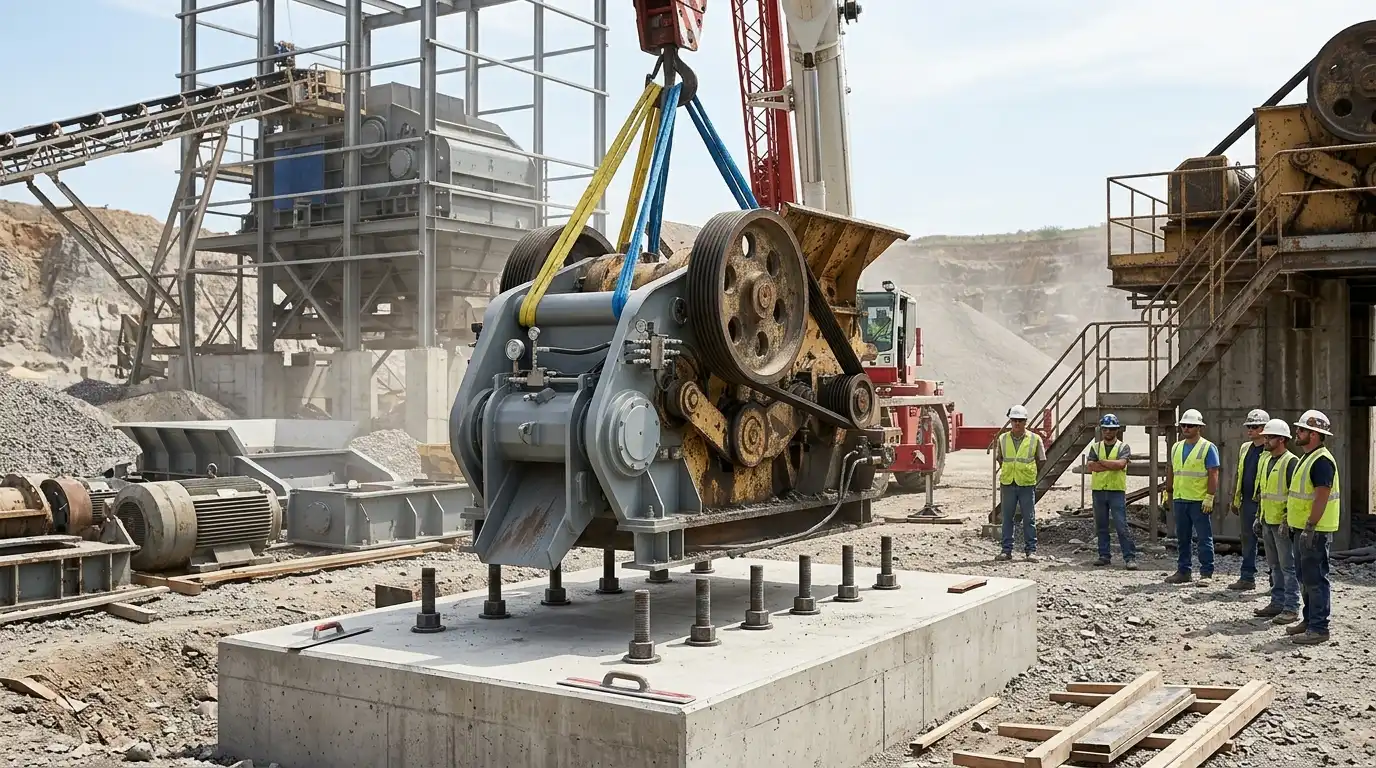
A jaw crusher generates large, repeating forces every time its jaw closes on rock. Those forces do not stay inside the machine — they pass into the foundation, the anchor bolts, and the drive components around it. Poor installation shows up later as loosening bolts, cracked grout, or a belt drive that wears out in months instead of years.
This guide follows one installation from foundation to first load. Each section builds on the one before it: foundation design sets the base, anchoring and leveling set the position, drive alignment sets the running condition, and guarding closes the job out safely.
Site and Foundation Requirements
A jaw crusher foundation is not a slab. It is a dynamic-equipment foundation, designed to a different standard than a foundation carrying only static weight. The American Concrete Institute’s ACI 351.3R covers this design category directly.
Three things separate a crusher foundation from an ordinary one:
- Mass and stiffness tuned against resonance. The foundation-soil system has its own natural frequency. Design practice keeps the crusher’s operating frequency below roughly 0.7 times that natural frequency, or above 1.4 times it. Running close to resonance amplifies vibration instead of damping it.
- Concrete strength suited to a heavy, cyclic load. Machine foundations commonly specify 4,000 to 6,000 psi concrete or higher, well above a standard slab. Thick pours also need a low-heat-of-hydration mix, since a large concrete mass can crack from its own curing heat.
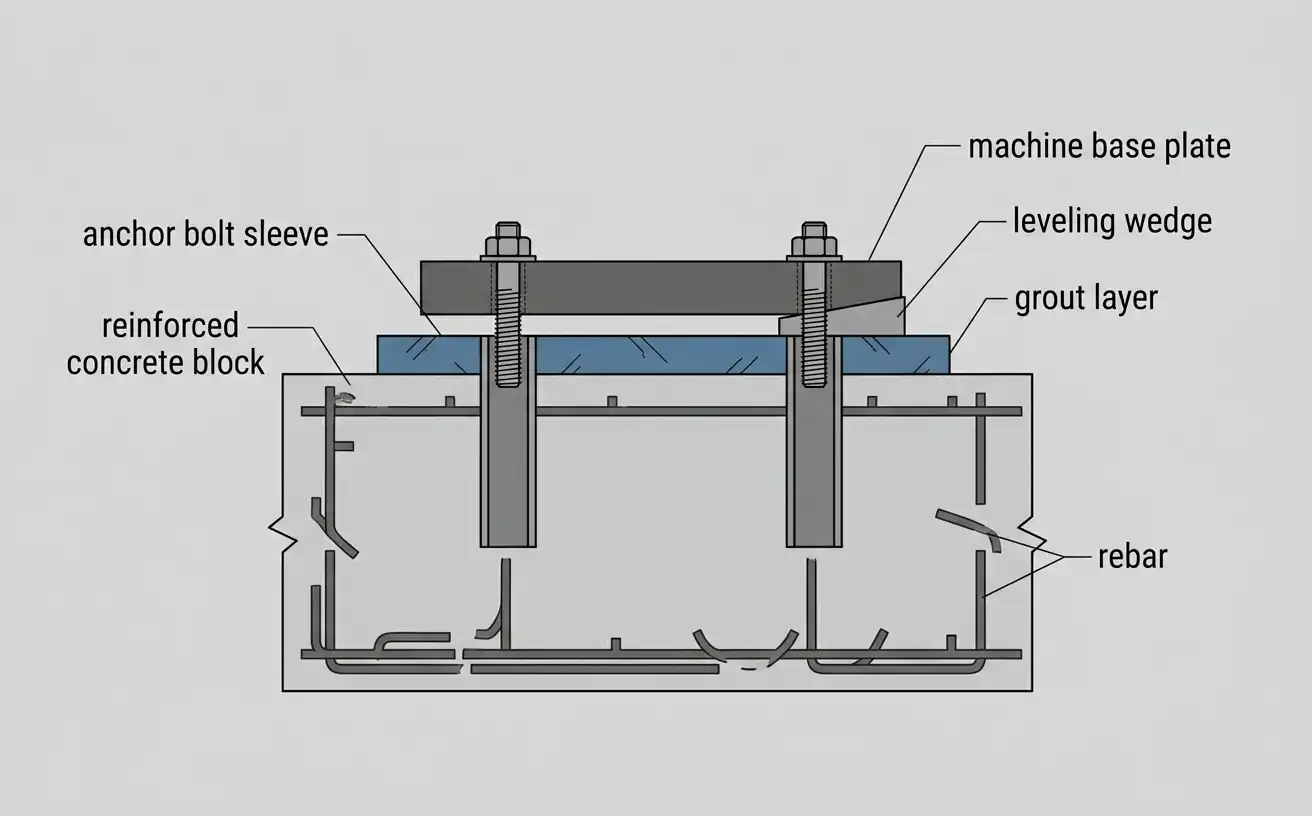
- Embedded anchor provisions placed before the pour. Anchor bolt sleeves, rebar, and any conduit runs go in before concrete placement, not after. Retrofitting an anchor into cured concrete is a weaker, more expensive fix.
A small PE Jaw Crusher needs a lighter, simpler foundation than a heavy-duty C Jaw Crusher running continuous shifts. Always design to the specific machine’s mass, operating speed, and dynamic load data from its manufacturer. Do not substitute a generic foundation drawing borrowed from a different model.
Foundation Installation and Grouting
Once the concrete has cured to design strength, three steps set the machine in its final position:
- Rough-position the machine on leveling wedges or screws, not directly on the bare concrete. This creates a controlled gap for grout and lets the machine be adjusted before anything is fixed permanently.
- Level and align the machine base to the tolerances in the manufacturer’s drawing. Positioning tolerance for anchor bolts and the machine base typically runs ±2 to 5 mm — tight enough that a laser level or precision survey instrument earns its cost here.
- Fill the gap with non-shrink grout, either cementitious or epoxy-based, so the machine base and foundation transfer load across their full contact area. A gap left ungrouted, or grouted with an ordinary shrinkable mix, becomes a rocking point under cyclic load.
Anchor bolts deserve their own attention. Cast them with a grouting sleeve or tube around the upper section. This keeps the bolt free to move for final positioning, before the sleeve itself gets grouted solid.
Torque anchor bolts to the manufacturer’s specified preload. Expect to re-torque them after the first run-in period. Field experience consistently shows the required clamping force running higher than the initial spec, once the machine has settled under load.
Machine Positioning and Leveling
Leveling is not a one-time check. A crusher base that reads level on day one can shift slightly as anchor bolts seat and grout cures fully. Re-check level before final torque, and again after the first days of operation.
Use a precision level or laser alignment tool across both axes of the base, not just the axis that looks easiest to check. An out-of-level base transmits uneven load into the anchor bolts on one side, which is a common, avoidable cause of early bolt loosening.
Drive Installation: Alignment and Belt Tensioning
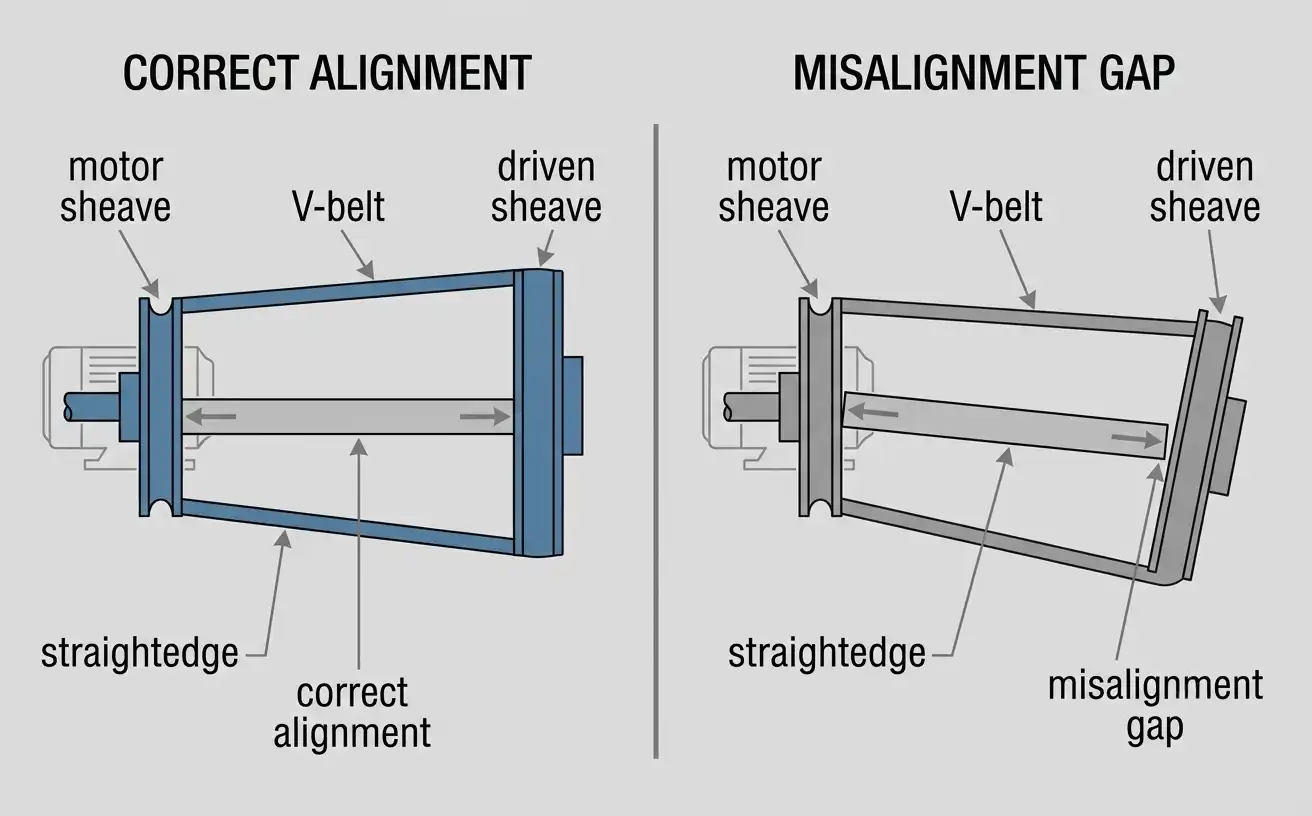
Motor and eccentric-shaft sheave alignment happens before the belts go on. Check both sheave faces with a straightedge, string line, or laser alignment device. Misalignment beyond about 1/10 inch per foot of center distance, roughly a half-degree angle, measurably shortens belt life.
Install belts by shortening the center distance on the adjustable motor base. Never force a belt over the sheave rim with a bar or screwdriver. A forced belt develops internal damage that shows up as premature failure weeks later, not as a visible defect at installation.
Set tension to the belt manufacturer’s chart for this specific drive, not to a general “feel.” After startup, re-check and re-adjust tension at three points: 20 minutes, 24 hours, and 48 hours of running. New belts seat into the sheave grooves during this period, and tension that was correct at installation typically reads low once seating is complete.
Guarding and Lockout/Tagout Compliance
Every belt, pulley, and flywheel on the drive must be guarded before the machine runs. This is not optional, and it is not a step to defer until after commissioning. In the United States, 29 CFR 1910.219 sets the specific dimensions:
- Nip-point guards at belt and pulley contact points must extend at least 6 inches beyond the pulley rim.
- Horizontal belt guards must extend at least 15 inches above the belt, or fully enclose the belt where it runs 42 inches or less above the floor.
- Flywheels within 7 feet of floor level need guard rails positioned 15 to 20 inches from the rim.
Lockout/tagout applies to every step of drive installation and adjustment, not only to routine maintenance afterward. De-energize and lock out the motor circuit before touching sheaves, belts, or guards at any point in this process. This includes the re-checks at 20 minutes, 24 hours, and 48 hours described above.
Pre-Start Checks and Run-In Period
Before the first start, confirm the following:
- All bearing points are greased per the manufacturer’s lubrication schedule.
- Anchor bolts are torqued to specification and the base reads level.
- Belt guards are installed and secured.
- The rotation direction matches the arrow marked on the frame — check this by bumping the motor briefly before a full start, not by running the machine to speed and hoping.
Run the first start with no feed material. Listen for unusual noise, watch for excess vibration, and check bearing temperature by hand or with an infrared thermometer at short intervals. Only introduce feed material gradually once the no-load run confirms normal operation. Increase toward full rated capacity over the first shifts, rather than loading to full duty immediately.
Common Installation Mistakes
Three failure patterns account for most early problems on a new installation, and all three trace back to a rushed step earlier in this guide.
Undersized or poorly detailed anchor connections fail first. One documented case involved cast-in weld plates connecting a crusher’s steel sub-frame to its foundation. The plates fractured from fatigue because the connection detail, not the concrete itself, was inadequate for the dynamic load. A connection detail is not something to improvise on site — it belongs in the foundation design, before the pour.
Skipped re-torque and re-tension checks are the second pattern. A bolt or belt that was correct at installation does not stay correct through the first run-in period. Skipping the 20-minute, 24-hour, and 48-hour checks in this guide is how that drift goes unnoticed until something fails.
Guarding installed as an afterthought is the third. A guard fitted loosely, or left off during a “quick test run,” is the one most likely forgotten for good once the machine is producing.
Frequently Asked Questions
What concrete strength is needed for a jaw crusher foundation?
Machine foundations for heavy, cyclic loads commonly specify concrete in the 4,000 to 6,000 psi range or higher, well above a standard structural slab. The exact figure depends on the specific machine’s mass and dynamic loading, so always confirm against the manufacturer’s foundation drawing rather than a generic figure.
How long should belt tension be checked after installation?
Re-check and adjust belt tension at 20 minutes, 24 hours, and 48 hours after the first start. New belts seat into the sheave grooves during this period, and tension typically reads lower than it did at installation.
Do anchor bolts need to be re-torqued after startup?
Yes. Anchor bolts commonly require a higher clamping force after the machine has run for a period than the initial installation torque specified. A re-torque check after the first run-in period is standard practice, not an optional step.
What guarding is required around a jaw crusher’s belt drive?
In the United States, 29 CFR 1910.219 sets specific dimensions for each component. Nip-point guards must extend at least 6 inches beyond the pulley rim, and horizontal belt guards at least 15 inches above the belt. Flywheel guards within 7 feet of the floor need rails 15 to 20 inches from the rim.